2. Position black bottom with the flanges up, on a flat surface.
3. Insert one side, inside bottom with the end marked TOP up. Both sides are identical. Insert screws into the corresponding holes and loosely snug with the nuts provided. Repeat this step with second side.
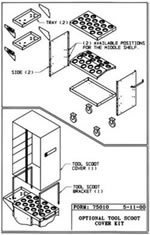
4. There are two possible locations for the middle angled shelf. Position the shelf into desired location.
5. Loosely fasten (2) tray supports to one of the trays. Place the tray, with attached supports, into position with the middle shelf. Insert bolts through the tray, side and middle shelf (hand tighten bolts). Fasten tray supports to the side.
6. Position top shelf over the sides. Fasten tray supports to remaining trays but do not tighten yet. Hold tray with supports on outside of the cart. Insert the bolts through the tray, top shelf and side. Fasten handle on opposite side.
7. Tip the cart on its side and fasten casters to the bottom. The swivel casters should be on the handle end. Stand cart upright and ensure cart is square. TIGHTEN ALL SCREWS AND NUTS. Check all fasteners periodically to assure tightness.
8. Place one each of the two mats provided into the trays. Slots are provided in each tray to mount a tool lock if you wish.
9. TOOLSCOOT is now ready to use. We recommend the heavier more frequently used tools be placed on the top shelf.
If any parts are missing or if you require assistance, please call our toll free hotline, 1-800-832-3838 and ask for your TOOLSCOOT representative.
